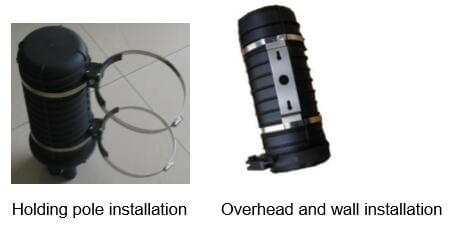
Fibre Optical Dome Type Closure Installation
Overview
Brief Introduction
Bonelinks fibre optical dome type closure is cap-type series closure equipping water-proof functions and applying to fiber to the home cable access protection and normal network transmission. The dome type closure reaches IP68 water-proof degree and excellent gas tightness, which can be installed PLC splitters and FBT splitters to meet different users requirements by increasing splicing trays. The max fibers can be installed at dome closure reach 288 cores. Bottom design of optical dome closure equips a big cable introducing hole and 4 small breakout holes. There is vulcanized rubber around conjunction between outer sheath cover and bottom parts.
Fibre optical dome type closure supports underground buried and aerial pole hanging with its good seal performance, which is the good choice at outdoor cable deployment.
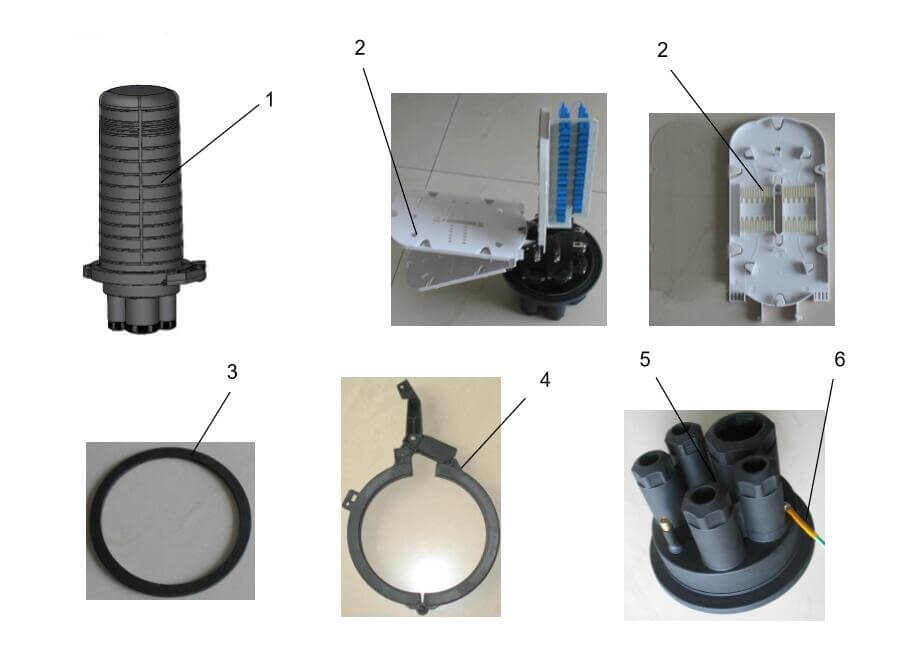
Operating Principles 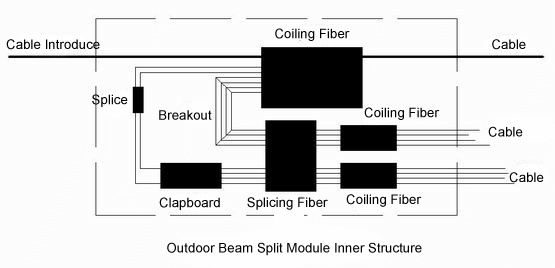 Component Details
| Part NO. | Names | Quantities | Usage | Notes |
| 1 | Housing | 1 PCS | Integrated protection connector | |
| 2 | Splice Tray | customize | Fix cable,protect heart shrink tube,hold fiber and splitting | |
| 3 | PLC splitter(at most 2:32 ) | 2:32(1 PCS) 2:16(2 PCS) | Splitting | Optional parts |
| 4 | SC Adapters | 36 pcs | Connect the cable | Optional parts |
| 5 | SC-1.5M Pigtail | 32 pcs | Connect outside fiber cable | Optional parts |
| 6 | “O”type sealing ring | 1 pcs | Fixing |
Attentions:
When customers choose to install when you tap, please refer to the following configuration tap input ports and output ports the length of the pigtail.
| Length of the output pigtail (+2 cm) | Length of the output pigtail (+2 cm) | |||
| 1-8 | 9-16 | 17-24 | 25-32 | |
| 135 cm | 85 cm | 90 cm | 95 cm | 100 cm |
Installation Preparation
Please check the models, optical fiber cable and optical cable sleeve coupling of accessories.
Keep all accessories dry and clean keep workplaces clean (dry and dust-free), easy to install
Split and standard tools during installation, use the specific
Please do not excessively bent during the fiber optical cablesApplication tools
Installation Process
1.Open joint box
2. Select appropriate screw holds
3. Strip fiber in a sealed unit and base
4. Secure the cables and steel-core
5. All sealing elements in the inlet and tighten the screws
6.Fusion splicer, fiber, fiber fixed deposit
7.Clamp chassis and enclosures8.
Assembly of external components and fix the connector box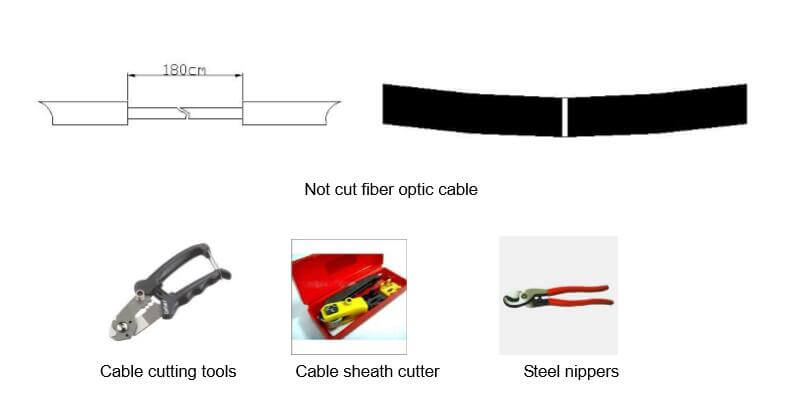 Stripping for a pair of fiber-optic cable, removed from the marked cable sheath.
Introducing fiber optic cable (2) and the other branch cable, 120 cm before the split sheath, maintenance of internal flexible cable in good condition.
Attention: ① Make sure optical fibre will not be hurt ② Do not use damaged fibre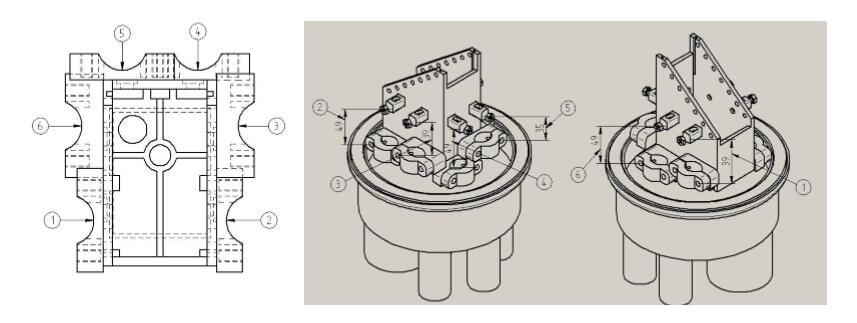
| Part No | Name | Quantities | Material | Performance |
| 1 | Grounding fix | 1 set | MPP | Fixed internal and external structure |
| 2 | Seal 16 fiber-optic cable outside diameter∮5~7mm | |||
| 3 | ||||
| 4 | ∮52 Washer | 1 pcs | Silica gel | |
| 5 | M55 Clamping bolts | 1 psc | MPP |
Remove the plastic hoop locking device, open the plastic hoop with the separation and the cradle.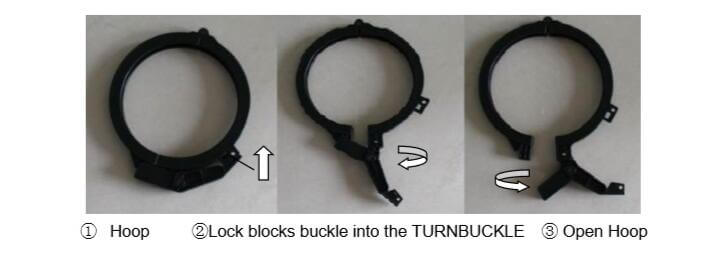 Optical cable will be needed accessing with the optical splice tray, as shown in the figure:
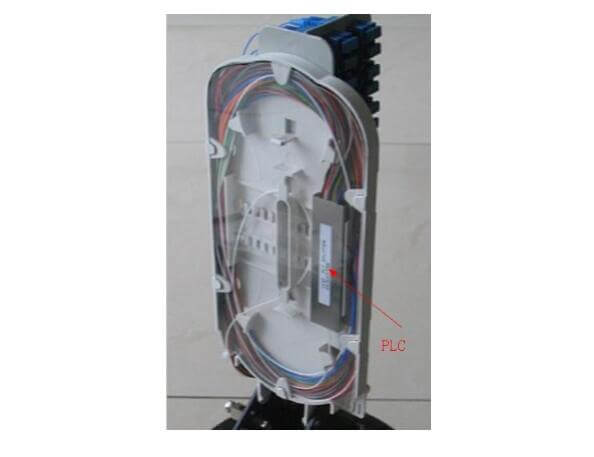 Fibre Optical Pigtail Installation
1. Welding sequence
2. Please bonded fiber splitter
3. After the pigtail coils good taps, place the plate fixing plate adapter into the fiber port. Please refer to diagram operation
4. The tap export pigtail into other fiber disks and raises the cable splice
Please refer to the following figure for pan fiber: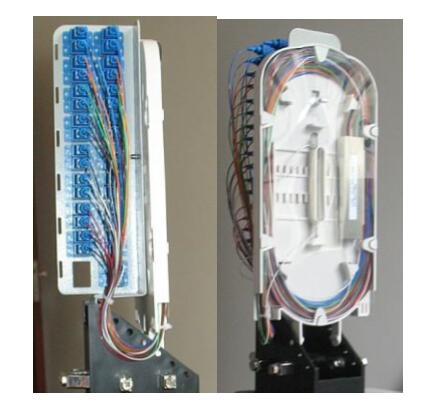 Attention:
- In the process of pan fiber radius should be more than 30 mm, if the RADIUS is too small, it will affect the fibre, even break fibers down.
- When the fibre, note bending direction often is “8”-shaped, keep all optical fiber in separators, so as not to use damage the fibre.
Final Installation
Sealing tape and putting the desiccant cartridge, installing box body shell, and then using the clip of the shell and the base pressure tight seal.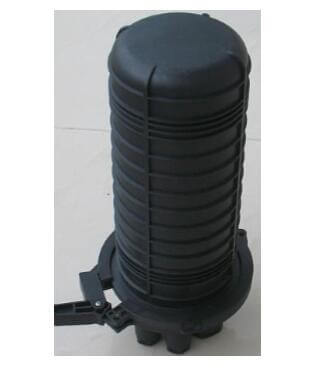 Hanging closure to pole with metal rack.